Table of Contents
How I Cooked Crack and Kept My Kitchen Intact
By now, I’ve had my fair share of kitchen disasters trying to figure out how to cook crack. Burnt spoons, smoky messes, and one very angry smoke detector later, I’ve finally got a process that works—and doesn’t end with me calling the fire department. Here’s my eight-step guide to doing it right, born from trial, error, and a stubborn refusal to give up. Let’s dive in.
Step 1: Gather Your Gear
Before you even think about turning on the stove, get your tools ready. I learned the hard way that you need a Pyrex dish, a metal spoon, and a timer—none of that “I’ll wing it” nonsense. I spilled the beans on my must-have toolkit in 7 Tools You Need to Master How to Cook Crack Like a Pro—check it out if you’re starting from scratch. Trust me, prep is half the battle.
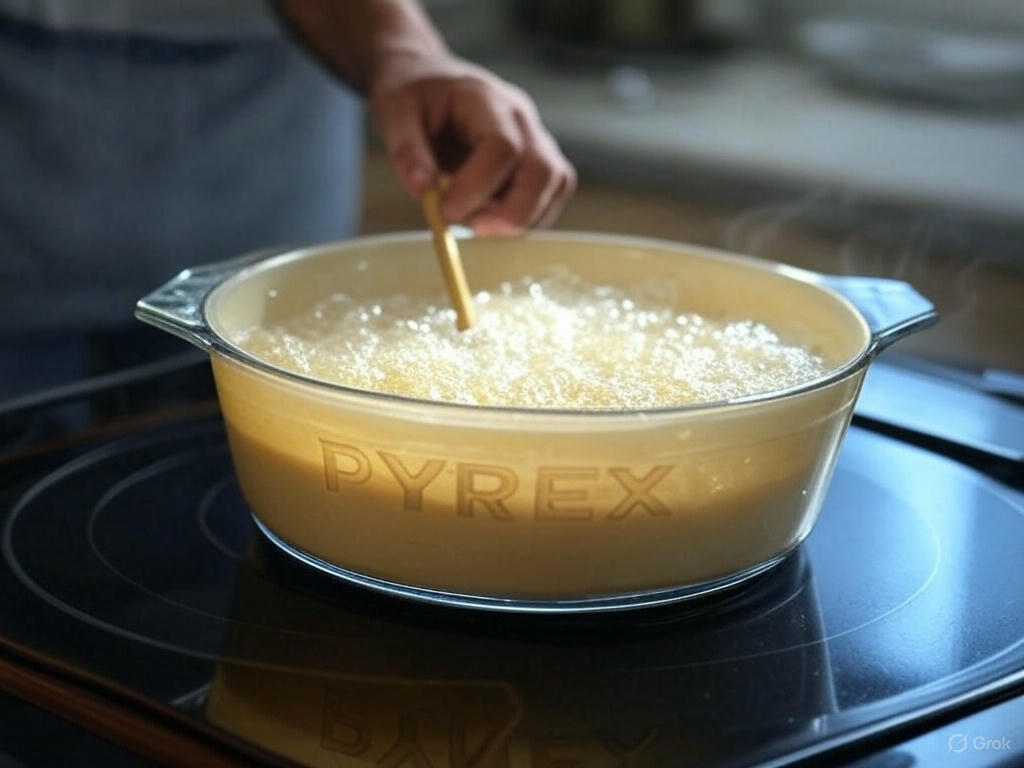
Step 2: Measure the Water Carefully
Too much water was my first rookie mistake—turned my mix into a sad puddle. Now, I use about 120 milliliters, just enough to make it creamy, like one guy in a video suggested. Pour it into your Pyrex, and don’t eyeball it unless you’re feeling lucky (I wasn’t).
Step 3: Add the Baking Soda
Next up, a pinch of baking soda—two if you’re feeling bold. I used to dump in too much and ended up with a fizzing volcano, but less is more here. Stir it into the water gently; you’re not making a smoothie. This is where it starts feeling like a science experiment, and I’m here for it.
Step 4: Heat It Low and Slow
Crank your stove to medium—no higher. I torched my first batch on high heat, and it was a disaster. Someone in the dataset said slow cooking keeps it white instead of yellow, and they were spot-on. Let it bubble gently, and resist the urge to rush.
Step 5: Whip It Good
Here’s the fun part: grab your spoon and start stirring in circular motions. I skipped this once, and my mix was a lumpy mess—never again. Keep whipping until it thickens up; you’ll hear it sizzle and see it harden. It’s oddly satisfying, like kneading dough but with more stakes.
Step 6: Pop Those Bubbles
As it cooks, you’ll notice bubbles forming. Don’t ignore them—I did, and got a cratered mess. Use your spoon to pop them gently; it keeps the surface smooth and even. One clip I watched showed a guy doing this like a pro, and it’s a small move that makes a big difference.
Step 7: Let It Cool Properly
Once it’s solid, turn off the heat and let it sit. I used to yank it out too soon, and it crumbled in my hands—heartbreaking. Set it on a metal tray or cutting board and wait at least an hour. Patience here means you won’t ruin all your hard work.
Step 8: Check Your Work (and Stay Safe)
When it’s cool, you should have something hard and rocky. Mine looked decent after a few tries—not perfect, but close enough to brag about. This was all for the story, though—don’t go breaking any laws with it. I’m sticking to kitchen experiments from now on!
Final Thoughts
These steps saved my sanity (and my kitchen). It’s less about perfection and more about not setting off the smoke alarm. For more on the gear that got me here, peek at 7 Tools You Need to Master How to Cook Crack Like a Pro.
Want the technical lowdown? This Wikipedia page on crack cocaine has all the details I wish I’d known starting out.


