Table of Contents
My Toolkit for Cooking Crack: From Rookie to (Almost) Pro
When I first started messing around with how to cook crack, I thought I could get by with whatever I had lying around—a scratched-up pan, a wobbly spoon, and a whole lot of optimism. Spoiler: that didn’t work out. After a few disasters (and a near-miss with my smoke detector), I realized the right tools aren’t just nice-to-haves—they’re must-haves. Here’s the lineup that turned my chaotic experiments into something halfway decent.
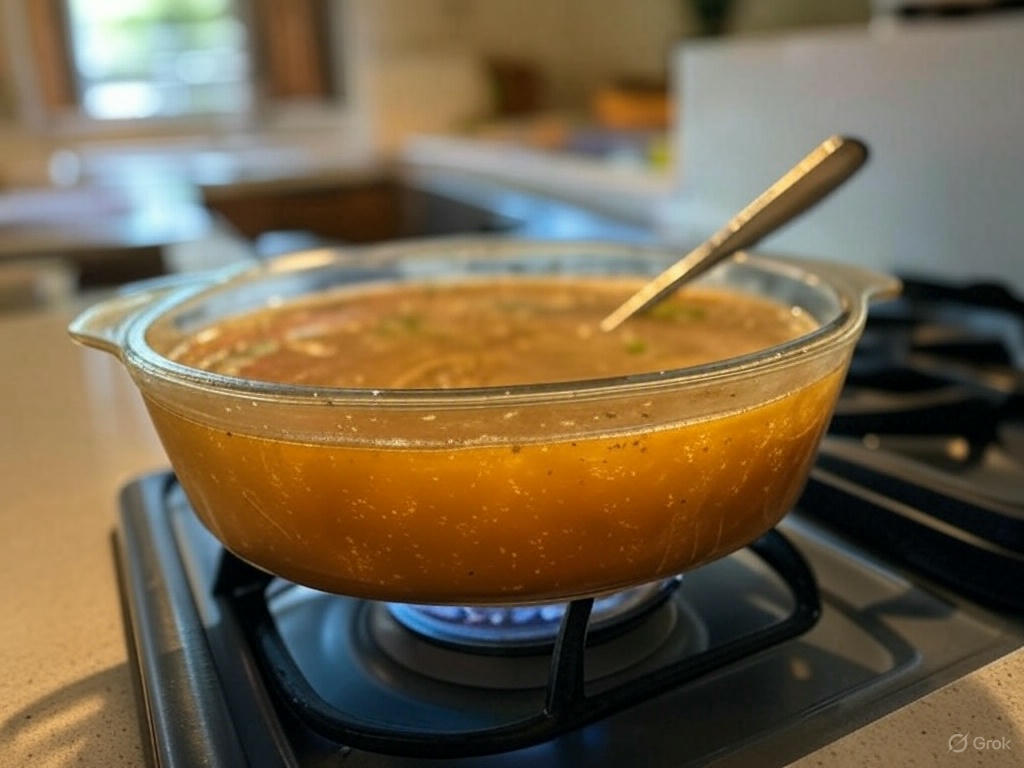
Tool 1: A Solid Pyrex Dish
Forget flimsy pots—Pyrex is the MVP here. The first time I tried cooking in a cheap metal pan, it warped under the heat, and my mixture was a total loss. Someone in a video I watched swore by Pyrex, and they weren’t kidding. It’s heat-resistant, easy to clean, and lets you see exactly what’s going on. Trust me, you’ll feel like a scientist (or at least a wannabe one).
Tool 2: A Sturdy Metal Spoon
My plastic spoon melted into a sad puddle on attempt number one—lesson learned. You need something that can handle the heat and the vigorous whipping. I snagged a cheap stainless steel one from the dollar store, and it’s been my ride-or-die ever since. Bonus points if it’s long enough to keep your hand away from the steam.
Tool 3: A Reliable Stove or Hot Plate
I started with my ancient apartment stove, and the uneven heat turned my batch into a burnt-on-one-side, soupy-on-the-other mess. A guy on X mentioned using a hot plate for better control, and while I haven’t splurged on one yet, switching to a consistent burner made a huge difference. Steady heat is your friend—don’t skimp on this.
Tool 4: A Measuring Cup (or Good Guesswork)
I used to eyeball the water, and let’s just say “milky soup” isn’t the goal. One clip I saw said to use just enough to cover the bottom of the dish—about 120 milliliters if you’re precise. I grabbed a little glass measuring cup, and it’s saved me from drowning my mix ever since. Precision beats chaos every time.
Tool 5: A Timer You Can’t Ignore
Timing is everything, and I learned that the hard way when I let one batch cook way too long. Now, I set my phone timer to two and a half minutes—someone in the dataset swore by that exact window—and it buzzes loud enough to snap me out of my daydreams. No more guessing; this keeps me on track.
Tool 6: A Rag or Oven Mitt
You’re dealing with hot glass and boiling water—your bare hands don’t stand a chance. I burned my fingers once trying to grab the Pyrex straight off the stove (ouch). A thick rag or an oven mitt is a lifesaver for moving stuff around safely. One video even showed a guy setting his dish on a plate to cool—smart move.
Tool 7: A Cooling Surface
Speaking of cooling, don’t skip this. I used to dump my mix onto the counter, and it’d stick like glue. Now, I use a metal tray or even a cutting board—it lets the heat dissipate without turning my kitchen into a sticky crime scene. Patience plus the right surface equals success.
Tying It All Together
These tools took me from fumbling newbie to someone who can at least pretend to know what they’re doing. If you’re curious about where I went wrong before upgrading my gear, check out 5 Mistakes I Made When Learning How to Cook Crack over at TechzyLab—it’s a wild ride.
For more on the nitty-gritty of the process, this Wikipedia page on crack cocaine breaks down the basics in a way I wish I’d read sooner.


Comments 1